How To Remove Mould In Bathroom Tiles?
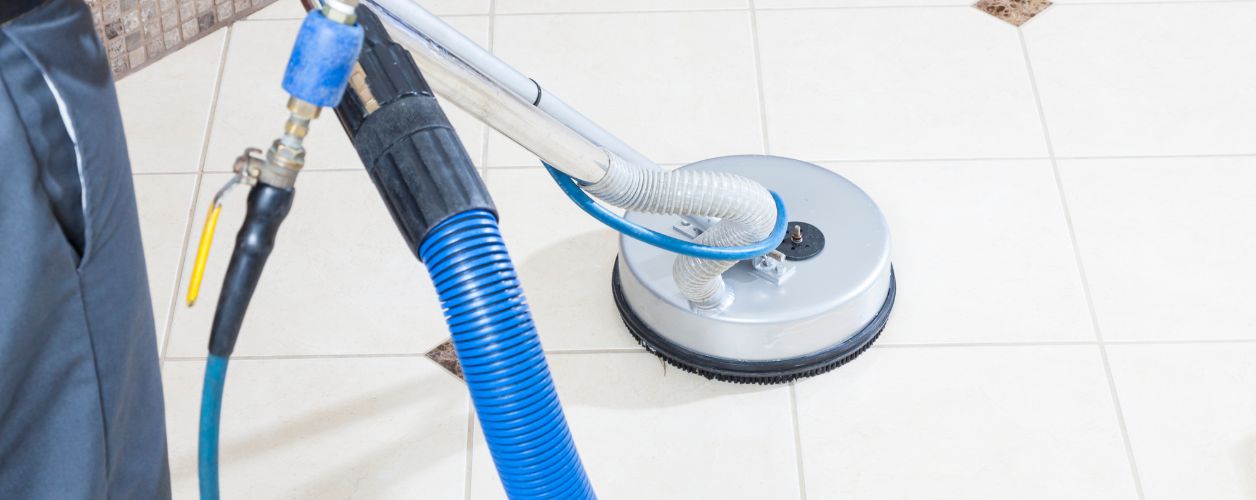
Table Of Contents
- Introduction
- Causes Of Mould Growth On Bathroom Tiles
- Identifying The Type Of Mould
- Preparation Before Cleaning And Mould Removal
- Solutions To Remove Mould In Bathroom Tiles
- How To Remove Mould In Bathroom Tiles
- How to Remove Deep Mould in the Grout
- How to Prevent Mould on Bathroom Tiles?
- Health Risks Of Mould
- When To Hire A Tile Mould Removal Service
- Eco-Friendly and Safe Practices For Mould Removal
- Conclusion
Mould forms wherever there is excess moisture from showers, baths, or even leaking pipes mingled with a little bit of organic matter- say, soap scum and dust. It is a kind of fungus that flourishes in wet, humid, and poorly ventilated climates. Warm and moist environments of New Zealand make ideal conditions for mould.
Mould appears in typical colours, black, green, or brown; these appear on tiles, grout lines, and the corners of walls where water tends to collect. Grout, being quite porous, is most vulnerable to absorbing water. If unattended, mould will not just be a nuisance to the surfaces it clings to, but it may also affect indoor air quality with some unpleasant odours and potential health hazards. Bathroom is a kind of fungus that flourishes in wet, humid, and poorly ventilated climates.
If your bathroom tiles also have mould and green patches, making the area slippery and accidents, here is your solution.
Causes Of Mould Growth on Bathroom Tiles
Humidity and Poor Ventilation
The bath mucks up the moisture as always with its hot-water showers and baths. When poorly ventilated-channelized under an exhaust fan or just an open window, the room retains moisture in the air and on almost all surfaces. This damp, warm ambience turns out to be the ideal environment for mould spores to develop, for they settle in and rapidly spread all over tiles, grout, and walls.
Leaky Pipes or Fixtures
Hidden leaks or slow leaks can be draining water in walls, floors, or under tiles from taps, showerheads, or even from their very own pipes. These damp areas, hence, can escape one's sight, allowing mould to stay unchecked for long. They keep surfaces moist with even just a little drip, thus fast-tracking the formation of mould on the bathroom tiles.
Soap Scum and Dirt Build-Up
Residues and scum from soap, shampoo, and body oils, combined with dust and dirt, form a fine film on the bathroom tile surfaces. This film retains moisture and acts as food for mould. In the absence of proper and timely cleaning, this grime settles in corners, along grout lines, and on tile surfaces-again, the best breeding grounds for mould to sprout and multiply. Regular cleaning helps prevent the growth.
Identifying The Type Of Mould
Common Bathroom Mould Species
The very common is Stachybotrys chartarum (black mould) with a dark green or black colouration, and which flourishes in damp grout. Other species include Aspergillus (powdery, colours vary) and Cladosporium (olive-green or brown spots).
Visual Cues
Observe colour, texture, and growth pattern. Black mould is sticky; some of it could be fuzzy or powdery.
When to Seek Professional Identification
If moulds on a large area, possess an unusual colour, recur despite cleaning, or are suspected to be toxic black mould, never think twice, call a certified mould inspector nearby for testing and removal.
Preparation Before Cleaning And Mould Removal
- Optionally, wear protective gear: Put your rubber gloves on to protect your hands. Put on a mask to keep spores from entering your lungs. If possible, wear goggles to shield your eyes from dirt and particles of mould and cleaning chemicals.
- Allow ventilation: Open the door and windows or keep the exhaust fan on in order to allow air and dry up moisture during the cleaning.
- Clear bathroom items: Remove soaps, shampoos, towels, rugs, and anything that can be carried away from tiles, grout, and even the corners.
- Inspect areas: Mould spots need to be identified, including hidden ones, for the effective planning of cleaning.
- Prepare cleaning tools: This includes brushes, sponges, and cleaning solutions.
Solutions To Remove Mould In Bathroom Tiles
Bathroom tile mould can be tackled in several ways, depending on your preference and the severity of the problem. From gentle natural solutions like vinegar and baking soda to stronger chemical cleaners and specialised mould removers, there’s a method to suit every home and cleaning style.
Natural Cleaning Methods
- Vinegar and Baking Soda Paste: Mix equal amounts of vinegar and baking soda to churn out a nice, thick paste. This paste is to be applied on the mouldy tiles or grout and left there for 10–15 minutes, after which it has to be scrubbed off with a brush to get it toxin-free.
- Sunshine of Salt Scrub: Mix lemon juice with coarse salt in any proportion to make nature's abrasive cleaner. Rub the mixture onto stained or mouldy areas and let it set for a while before rinsing away with a fresh citrus aroma.
- Hydrogen Peroxide Spray: Fill the spray with 3% hydrogen peroxide and spray on the dangerous moulds; keep it about 10 minutes - scrub, rinse, disinfect.
Chemical Cleaning Solutions
- Mould-removing products: Read labels for suitability on tiles and grouts. Use as directed by the manufacturer for safe and effective application.
- Bleach solution: Combine one part bleach with three parts water. Apply with either a sponge or a spray bottle. Always maintain adequate ventilation in the area and wear gloves and a mask.
- Application tips: A 10-15 minute stand time is required before scrubbing with a brush to remove mould stains.
- Stronger agents: For persistent moulds or black mould infestation, stronger commercial products or even professional cleaning agents must be used; safety precautions shall be observed in order to avoid any health risk.
How To Remove Mould In Bathroom Tiles
Initial Dusting:
The very first thing to do is to wipe down the affected tile surfaces with a damp cloth or sponge to remove loose mould and dirt.
Setting Cleaning Agents:
A commercial mould remover should be sprayed onto the mould patches. Alternatively, dilute bleach solution (1 part bleach to 3 parts water) could be used, or natural alternatives like vinegar could be sprayed.
Working Time for Solution:
Let the solution do its work for 10-15 minutes to effectively break down the mould spores and stains.
Scrub the Surface:
Scrub the surface with a non-abrasive scouring pad or soft brush to lift off the mould while preventing any scratches on the tiles.
Wipe Clean:
Clean off the residue with a clean, damp cloth.
How to Remove Deep Mould in the Grout
Targeted Application:
The cleaner should be applied onto the grout lines as they tend to hold mould more stubbornly than tile surfaces.
Scrub with Stiff Bristles:
A toothbrush or a grout bamboo brush would be the best to get into the tiny pores of the grout.
For Tough Stains:
A paste of baking soda and water should be applied to the grout, followed by spraying a vinegar solution. After about 5-10 minutes of fizzing, go ahead with scrubbing.
Bleach Option:
For persistent mould, the diluted bleach can be applied with a small brush to help restore the grout colour. Make sure you are well ventilated when using this.
Rinsing and Thorough Drying
Rinse Away Residue: Rinse away with clean water to ensure no residue of the cleaning agent is left, as any residue of the solution will further attract mould growth.
Dry Thoroughly: Dry everything completely using a clean towel or microfiber cloth, paying particular attention to grout lines.
Encourage Air Circulation: Keep the windows of the bathroom open or turn the exhaust fan on, as this will speed up drying while keeping humidity levels down, which will fend off the mould.
How to Prevent Mould on Bathroom Tiles?
- Keep the Air Circulating – In bathrooms, install exhaust fans or at least keep the windows open after taking a shower. This action will lower the humidity level.
- Use Mould-Resistant Sealants – Silicone-based or mould-resistant sealants may be applied to tiles and grouts and thus keep spores from attaching themselves.
- Keep up Easy Maintenance – Regular cleanings of tile and grout surfaces with mild detergents, which shuts the growth down for mould.
- Control Moisture Level – Dehumidifiers come in handy in maintaining just the right humidity level in areas prone to dampness.
- Fix All Leaks Immediately – Leaky taps, showerheads, and drainage pipes should be repaired because moisture sources are a welcome growth area for mould.
Health Risks Of Mould
Allergies and Respiratory Problems
According to the spores, mould can create sneezing, coughing, rhinitis, pruritus of the skin, and throat discomfort. After prolonged exposure, they tend to exacerbate bronchial conditions.
Effect on Vulnerable Groups
Children, elderly persons, and asthmatic or immunocompromised individuals in NZ are prone to mould exposure. This leads to increased asthmatic attacks, difficulty in breathing, and the occurrence of allergy symptoms.
Long-Term Effects
Repeated exposure to moulds can keep one from having sinus infections, tiredness, and lung inflammation, especially when one is susceptible. Immediate removal is of value to stop further deterioration.
When To Hire A Tile Mould Removal Service
You need to call a tile professional in New Zealand in the following cases:
- Persistent mould growth – When mould keeps coming back even after being cleaned to the highest standard, there is probably a moisture problem in the structure that needs expert attention.
- Large infestations – Removal by a competent professional is advised for an area greater than 1 square metre, to avoid any health risk and for the guarantee of complete eradication.
- Structural damage – Walls, ceilings, or flooring can be weakened by moisture; therefore, specialists must make an inspection and repair accordingly.
- Hidden mould – The experts can find and remove mould in hidden parts of the property, e.g., behind tiles and under flooring.
- Health concerns – Cases concerning persons who have asthma, allergy, or a weakened immune system have to be safely removed with the intervention of professionals.
Eco-Friendly and Safe Practices For Mould Removal
Limiting Chemicals Used:
Select biodegradable, plant-based cleaners. Try natural cleaning alternatives such as vinegar, baking soda, and lemon; they're less detrimental to the environment. Dilute stronger substances before disposal.
Healing Disposal of Cleaning Materials:
Dispose of hazardous cleaners under the directions of your local council-never ever pour chemicals down drains or into waterways. Take any leftovers to hazardous waste drop-off centres. Reuse or recycle the containers where possible.
These are just some steps that will lead to the conservation of the unique ecosystems of New Zealand, the reduction of pollution, and the promotion of a clean working environment in the home.
Conclusion
Mould removal from bathroom tiles is accomplished by natural cleaners such as vinegar or commercial ones for more stubborn stains, deep-cleaning of grout, and proper drying. To prevent mould formation, keep free ventilation, fix any leaks as they arise, use mould-resistant sealants, and clean at regular intervals. Keep up consistent maintenance, and you will be rewarded by a freshwater, healthy bathroom, with mould staying at bay.
YOU MIGHT ALSO BE INTERESTED IN
Capital Cities
- Tilers Services in Whangarei
- Tilers Services in Auckland Central
- Tilers Services in Hamilton
- Tilers Services in Whakatane
- Tilers Services in Gisborne
- Tilers Services in Napier Terrace
- Tilers Services in Stratford
- Tilers Services in Palmerston North
- Tilers Services in Wellington Central
- Tilers Services in Richmond
- Tilers Services in Nelson East
- Tilers Services in Blenheim Central
- Tilers Services in Greymouth
- Tilers Services in Christchurch
- Tilers Services in Dunedin Central
- Tilers Services in Invercargill
- Tilers Services in Waitangi


